Build a circuit in the Digital editor
Open a notebook with a Python kernel and select Digital at the top, or use CASCAQit: Open Digital Editor in the command palette. On desktop, the editor and notebook appear side by side. Press Esc to leave the editor's full-screen view.
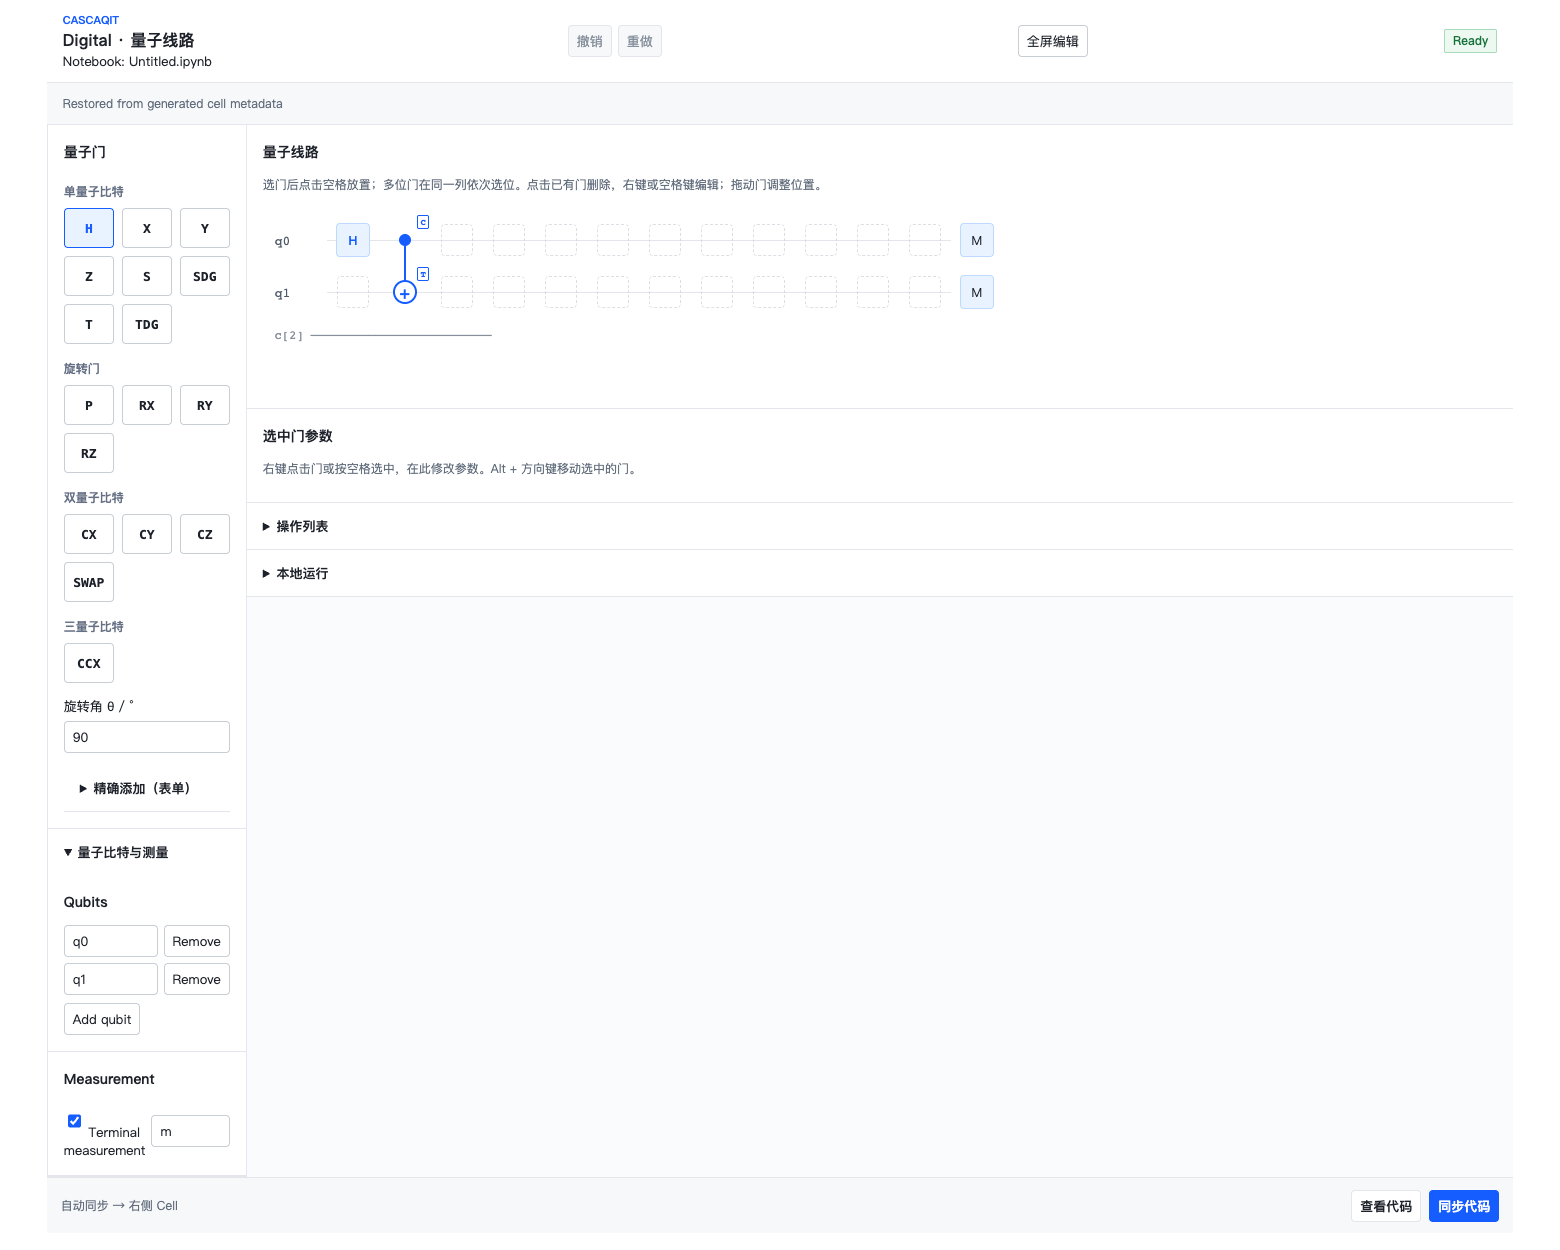
The Bell template in full-screen editing mode. Choose gates on the left, place them in the circuit, and synchronize code at the bottom. Run the cell or select Run to execute it. Open full-size image
Build the Bell circuit
- Create a Bell template from the workbench, or configure an editor with two qubits.
- Select H from the gate palette and place it in the first column on qubit 0.
- Select CX and, in the next column, click the control followed by the target. The last selected qubit is the target.
- Keep terminal measurement enabled and check for M on both wires.
- Read the generated code on the right. Check gate order, qubit assignments and measurement against the canvas.
Grid columns control layout; empty columns do not insert a physical delay. You can drag a gate to move it; conflicting placements are rejected. Clicking an existing gate deletes it. To edit its parameters, right-click it or select it with the keyboard and press Space. Use Undo to recover from an accidental edit.
Check the angle units
The gate palette and selected-gate parameters use degrees. Generated Python converts them to radians: RY at 180° becomes π. The expanded 精确添加(表单) (precise entry form) continues to use radians. Do not pass 180 directly as the SDK rotation angle when you mean 180°.
Try a one-qubit RY(180°) circuit with terminal measurement: the result should be almost entirely 1. Change it to 90° and compare the finite-shot counts. See the gate lesson for the ideal probabilities.
Code synchronization and execution are separate steps
After a brief pause, a valid edit updates the linked code cell. 同步代码 retries synchronization and 查看代码 locates the cell. Synchronization does not run the experiment or save the notebook to disk.
Expand 本地运行, choose LocalBackend · 本地模拟, and set shots and seed. Choose one execution path:
- Run the generated cell to see the program and result in the notebook.
- Select Run in the editor to execute its program in the active kernel and view job state.
Editing the canvas or run options does not recompute old output. Check whether a past result is marked stale, then run the new version. A plot from the previous run does not describe the current parameters.
Detached after a manual code edit
Editing or deleting a generated cell puts the editor into Detached, which stops automatic overwrites. Select 生成到新单元格 (generate in a new code cell) to keep your manual code and establish a new link. Review the new cell before running it. The editor does not parse arbitrary Python back into a canvas.
Saving a notebook preserves its editor document, gate positions and run options. After a kernel restart, rerun the code; a stored job ID cannot restore the complete in-memory result. See Save and restore your work.